4. First steps
The first step is to either create a new project or to download the “Example.zip” file provided in the client space and open the project contained there.
Project example
Open VisionLidar and go to Menu: File / Open and browse to the location of the file "VisionLidar_Example.vlp" in the subdirectory "Samples" in the installation program directory. A project showing a roundabout should be visible. Several points have already been classified and several elements have already been vectorized.
Create a new project
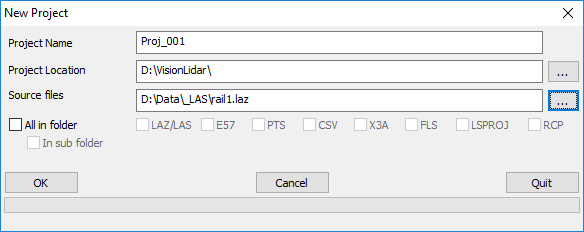
In order to create a new project and import the point cloud file(s) into it, please access Menu: File / New. The project creation interface offers different options.
The name and location of the project is determined here. Please note that special characters are not accepted in the name. In addition, the selected location cannot contain spaces.
In the "Source files" section, point cloud files must be selected. Several data formats are accepted: .las, .laz, .e57, .pts or .csv.
To use the advanced project creation functions, you can consult this link.
Navigating with VisionLidar
Once the project is created, you can immediately visualize your data. Zooming is possible with the mouse wheel. Pressing the wheel will activate the pan. A left click will allow you to rotate the view. A double click on the left button of your mouse will update the point of rotation within the point cloud.
Additional information
For additional information, go to Menu: Help / Help. This option will open your web browser where the VisionLidar online documentation can be found.